
Sunday, March 24, 2013

Thursday, November 1, 2012
Monogrammed hand towels

First I gathered my supplies:

You will need flour sack towels (not the softest but they are easier to paint because they are flat. The more plush the towel then the stencil will not look as crisp. I found these towels at Kmart for about $3.00. You will also need some freezer paper, paint, sponges, an exacto blade and cutting mat, and a pencil for tracing.

First I went to the leotine website and looked at the different monogram options until I found one that I liked. After that I enlarged it on my computer screen. I simply taped a piece of freezer paper up to the screen (shiny side down) and traced the image. I lucked out that they had one with two of the three letters I was using. So I only had to "design" one letter on my own. After tracing the monogram on the freezer paper I cut it out with my exacto knife. (remember you are keeping the outline not the parts that you cut out)

Iron on the freezer paper (remember it should be shiny side down). The freezer paper will "stick" to the towel helping to prevent any leaks. Next simply dab on the paint with the sponge. Remember not to press too hard or use too much paint.

I peeled the stencil off as soon as I was done and then waited for it to dry. After I would suggest heat setting the paint. (I think to do this you just flip the towel over when it is dry and iron on the back?)
And Ta Da! Here is the finished product. Not perfect but for about $7 I was able to make three towels. Totally worth it for the amount I saved in my opinion. :)

Tuesday, October 30, 2012
Going room by room..
So now for some much awaited after photos of the house. I thought that going room by room would be best to really show the transformation. I know that everyone has already seen the after shots of the bathroom but the process was pretty time consuming for such a small room. So I will share the details :)
 Here was the inspiration for the room:
I found the wall paper on ebay. Here is a link to another source selling the same paper.vintage wallpaper.


I found the wall paper on ebay. Here is a link to another source selling the same paper.vintage wallpaper.
When we first moved into our house
I knew the half bathroom needed a facelift. The because the vanity stuck out so
far in the small room to sit on the toilet you had to sit at an angle to avoid
hitting your knees.


Within 24 hours of closing on the
house I started peeling off the wallpaper. The top layer of paper came off
easily, the bottom layer however had to be painstakingly scraped off. It took hours, and I thought it was going to
be the most annoying part, little did I know.


After getting all the paper off we
started to address the issue of the sink. I knew that the vanity was just
sticking out too far from the wall, and thought there must be a better option
out there. At first I wanted to get a corner sink to maximize the space in the
small room. Although after realizing that we would need to pay to have the
plumbing moved over, we knew it would blow our $500 budget for this room.
A few hours of Internet searching
later I came across the Lillangen sink. At
only 10 inches in depth I knew it was the sink for us and the $79 dollar price
tag wasn’t to bad either. Now sitting on the toilet would be no issue, and
since it was wall mounted there was no bulky vanity to worry about. So up to Ikea we went and came home with a
snazzy new skink.
We ran into an issue, because there
were no studs where we needed them to be the brackets kept falling out of the
wall. After much trial and error we found Wing-its my husband installed them
and they worked like a charm! Next step was simply attaching the sink and
faucet.


Yay! now you can see that there is room between the toilet and the sink!!!
After that came the wallpaper. I
had found some great vintage black patterned paper on ebay. I have never hung wallpaper before. This was by far the most. frustrating. part. ever. Cutting the vintage paper resulted in some
tears and then hanging it resulted in some tears. I had planned on doing a little DIY post on how to hang wall paper. Here it is....
step 1. call a professional.
step 2. pay the professional.
step 3 pour yourself a glass of wine and relax because your wallpaper looks great.
Although if your like us and money is tight and you can't pay a professional just be patient. Cut the paper with a VERY sharp blade. And take breaks when you get frusterated. This photo on the right was taken about 30 seconds before Robby ripped a hole in the paper got pissed off and left for me to finish the job. lol. But eventually we got it all
up. I really think that it changes the entire look of the room and is definately an upgrade :)


We decided to keep the wall tile
because it was neutral and in good shape. The floor tiles were peel and stick
so we removed those and I tiled the floor. This was actually a pretty easy job.
We used an outdoor light for over the
vanity that was only $25 dollars and my mom found the mirror for us at a garage
sale.

I made a simple skirt for our sink
using some fabric, ribbon and Velcro. It helps to hide the plumbing and provide
us with some secret storage. We spaced this project out over about three weeks
and stayed under our $500 budget.
Budget Breakdown:
Wallpaper $100.00 Mirror $10.00
Wallpaper Supplies $20.00 Sink $79.00
Faucet $69.00 Vanity Light
$25.00
Misc. supplies $50.00 Floor tile $125.00
Sink Skirt supplies $20.00 Total: $ 498.00
Just a quick recap:

Just a quick recap:

Stay tuned for a post tomorrow on how I made the monogrammed hand towel that hangs in the bathroom. I will continue to do room by room posts for the next few weeks! Enjoy :)
<3 c="c" p="p">
Friday, September 28, 2012
Some House Photos


Lets start at the beginning. Here are some before photos of the rooms in our house.


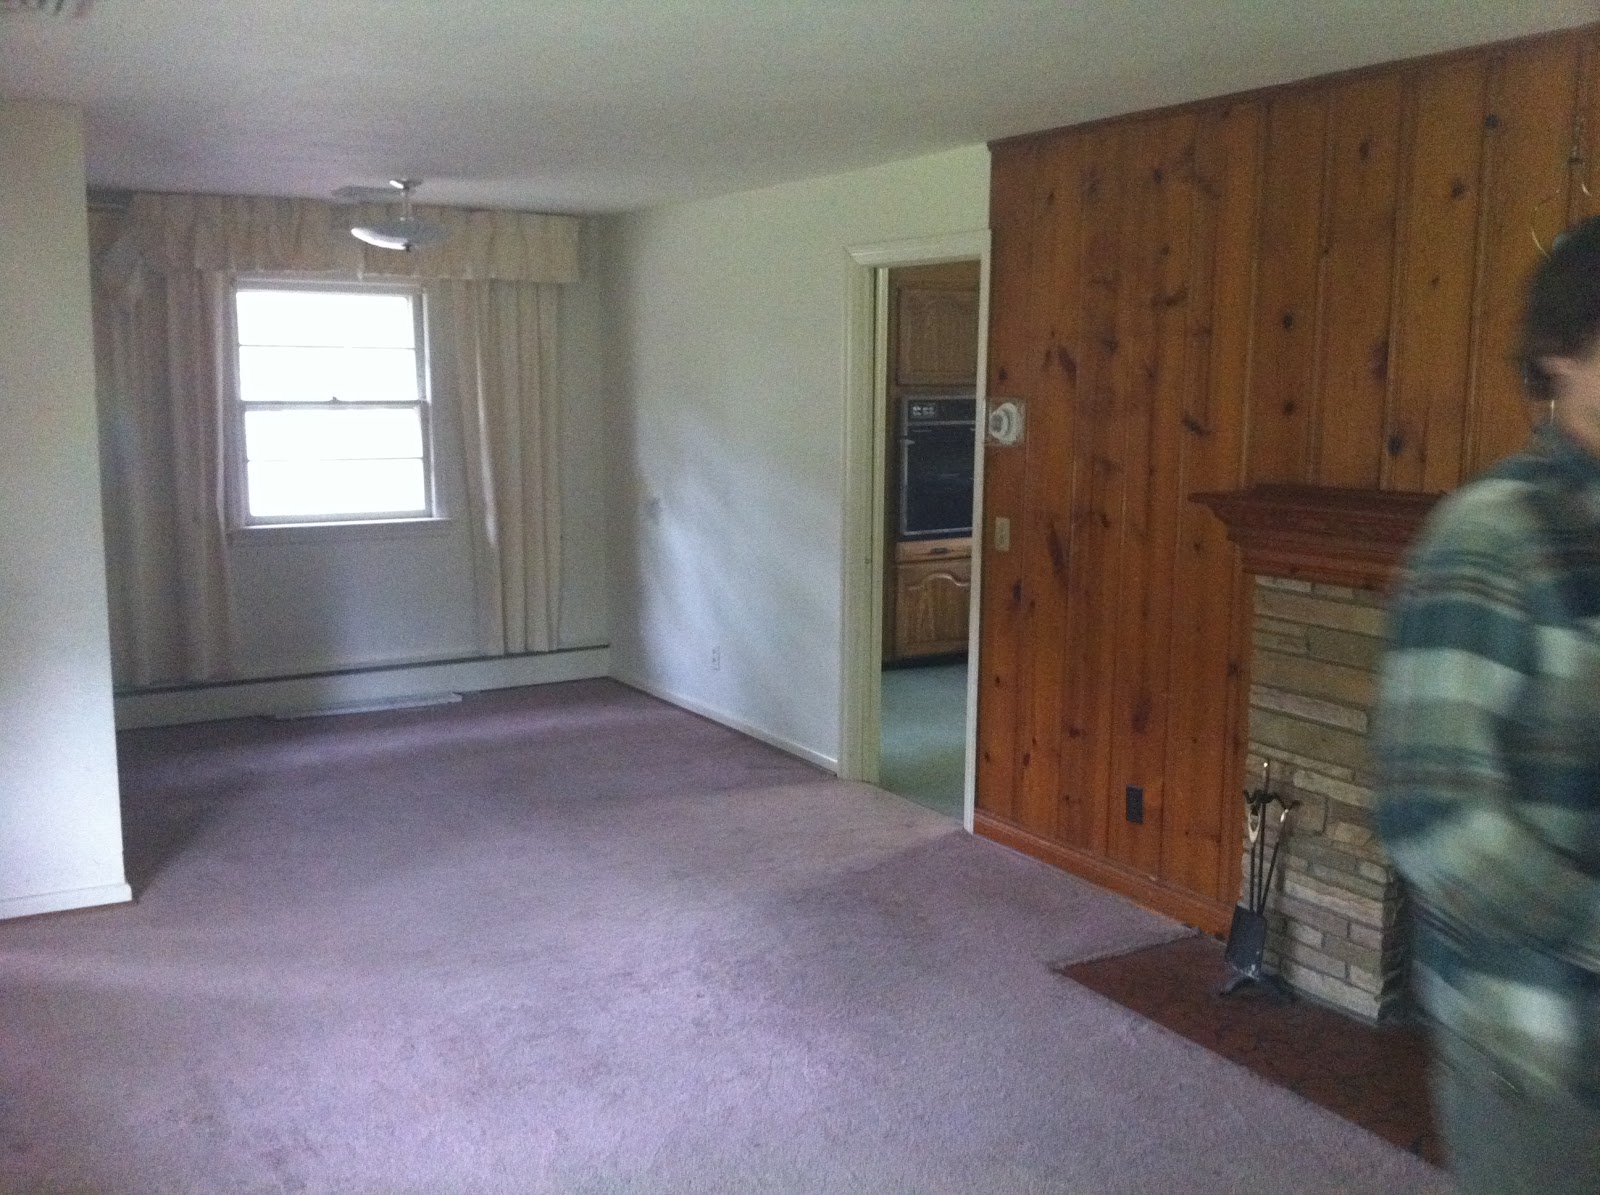
In the kitchen there were only cabinets on two walls, as you can see there was one entire side of the kitchen with a weird corner that jutted out. This really seemed like wasted space to us. Here I am striking a pose before demo started. Below you can see our living/dining room. I love how the two rooms are open to each other. This way we can watch tv and eat dinner and it just provides more seating/room. I didn't love the dark paneling wall to wall carpet and again gross curtains.

 Now for the gross dog room. We are using it as our office now but before dogs or cats had been kept in the room and the floor was chewed up and destroyed. The dark paneling on the walls didn't help any either. I can't seem to find any pictures of before we started to rip the tiles up. So here was a progress picture. Before there were teal and black tiles that were nasty on the floor.
Alright well thats a little "before" update, stay tuned for some "afters" and more details on the projects we have finished. It is so weird posting these photos, we've come a long way in such a short amount of time.
<3c p="p">
Tuesday, September 25, 2012
shutter color option 1
Just helping a friend imagine her house with a different paint scheme. Interested in something like this? Just email me at carla.mae.ryan@gmail.com and I would be happy to do the same for you! 
Thursday, August 23, 2012


Subscribe to:
Posts (Atom)